After you remove the Wacom One from the box and are ready to begin using it, connect it to your computer using the steps in option A or B, depending on your computer's setup.
Note: "Wacom One" refers to both the Wacom One 12 and Wacom One 13 touch.
Connection Options
- Option A: Connect to a computer with a USB-C port that supports graphics output
- Option B: Connect to a computer with USB-A and HDMI ports
If you are not sure which ports are available on your computer and don't know what to chose, see our Guide here: How do I find out which connections my computer or smart device supports?
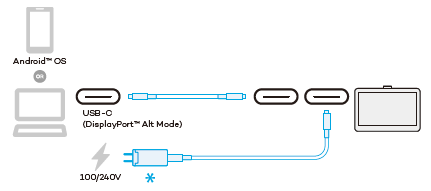
Option A: Connect to a computer with a USB-C port that supports graphics output
Note: To save energy, Wacom recommends using option A to connect the Wacom One to your computer.
- Insert one end of the USB-C to C cable into either one of the two USB-C ports on the Wacom One and insert the other end into a USB-C port that supports graphics output on your computer.

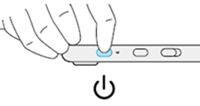
- Turn on the Wacom One.
-
Install the driver.
Important: If the power status LED is blinking quickly (or if nothing displays on the Wacom One screen) after completing steps 1 through 3, continue with steps 4 through 6 to connect the power adapter. This will provide the additional power that your computer requires.
- Assemble the Power adapter by attaching the plug plate to the adapter and then sliding it down until you hear a click.
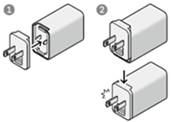
Power adapters vary based on region.
- Insert one end of the USB-C to C cable into the power adapter and insert the other end into the available USB-C port on the Wacom One.
- Plug the Power adapter into a power source.
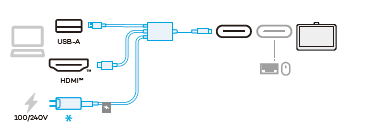
Option B: Connect to a computer with USB-A and HDMI ports
- Assemble the Power adapter by attaching the plug plate to the adapter and then sliding it down until you hear a click.
Power adapters vary based on region.
- Attach the power adapter to the 3-in-1 cable.
- Insert the USB-C cable into either one of the two USB-C ports on the Wacom One.
- Insert the USB-A and HDMI cables into their respective ports on your computer.
- Plug the Power adapter into a power source.
- Install the driver.